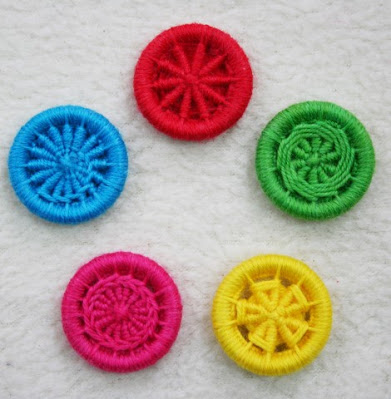
Flower Button Ring, just in time for Mother's Day!
I've been meaning to post this tutorial for a while, and this morning as I was lazing in bed I thought 'Ah ha, I could post that Ring tutorial for Mother's Day!' So here it is. Plus I get to use it as a blatant plug for our spankingly brand new button yarn, hand painted in my kitchen!
P.S. we have rings on our website if you can't find any ;-)
Thank you to Noelle for modelling the finished ring.
Flower button ring tutorial.
Materials
1 brass ring about 1.5cm across, approximately 2m of Beaker Button hand painted button yarn, blunt ended needle, scissors.
.jpg) |
| Materials |
There are four stages to
making a Dorset Button on a ring.
Casting, Slicking, Laying and Rounding.
Change the amount of petals
by varying the amount of spokes.
Remember that you must have an even number of spokes.
Casting
Have a length of yarn
approximately 2m long.
Tie the yarn round the ring
in a single knot, leaving a tail of about 1cm.
Stitch round the entire ring
in blanket stitch, covering the tail as you go.
Bring the needle towards you through the ring and pass it away from you
through the loop created. Make sure to
cover the whole ring, moving the stitches along the ring so there are no gaps.
 |
| the first knot |
 |
| blanket stitch round the ring |
 |
| done |
Slicking
Turn all the stitches so that
they face inwards, leaving a smooth edge to the button. The thread should drop from the back of the
button at the top.
 |
| twist your stitches to the middle |
 |
| done |
Laying
When laying the spokes make sure the spoke you are laying is perfectly in the centre of the ring at the front. Don’t worry about the back,it will not be central. The holding stitches you put in will pull the back spokes into place.
Bring the yarn towards you under
the ring then back up. This forms one
spoke. Turn the ring to the left wrap again until there are several spokes around the
ring. The spacing should be even. For a flower button 10 spokes looks
good (gives you five petals). Make two stitches in the
centre of the wheel to hold the spokes in place, being careful to catch all the
threads from the back into the middle. I make my second stitch across my first,
so they look like a cross. If your spokes are not central and you want them to
be, firmly tug the middle until it’s placed centrally, using the side of the
needle.
 |
| first wrap down and back up |
 |
| next wrap to the left |
 |
| and back up over the centre |
 |
| first holding stitch from the back |
 |
| to the front |
 |
| second stitch over the first |
Rounding
Round 1: bring the needle up
through the button from the back. Pass
it down through the button clockwise (right) two spokes. Bring it up through the work anticlockwise
(left) four spokes including the two spokes you stitched over first. I think of it as over two, under four. Continue in this way
until you have reached the first stitch.
You should have five stitches.
Round 2, 3 and 4: repeat round 1
following the same stitches.
 |
| two spokes clockwise |
 |
| four spokes anticlockwise |
 |
| two spokes clockwise |
 |
| first complete round |
 |
| four rounds complete |
Finishing and making the ring bit of the ring
Thread the needle through the back of the button. Start at the opposite side from the tail and bring the needle out by the tail. Pull the thread until you have a loop big enough for a finger (you choose the finger). Repeat this so you have two loops. Stitch round the loops in the same way as you cast round the ring to start with, a blanket stitch. Once you've covered the whole back loop thread the tail through the back twice to secure it and trim.
 |
| making the first finger loop |
 |
| finger loop |
 |
| two finger loops |
 |
| casting round your loops |
 |
| like this |
 |
| all the way round |
 |
| thread the tail through the back to secure and trim |
Wear it out and show off to all your friends.
 |
| Noelle :-) |
© Jen Best. www.beakerbutton.co.uk
This is a free tutorial, and I don't mind if you make rings to sell. Please don't reproduce these instructions for sale though and don't forget to tell people where you got them. Many thanks. Jen :-)


Comments
Post a Comment